Thursday, January 31, 2013

INFECTION CONTROL 10


Autoclaves
This is the most efficient method of sterilizing instruments, packs and dressings, and is suitable for most materials. An autoclave is basically a pressure cooker and in fact, there is no reason why a domestic pressure cooker should not be used to sterilize instruments in a small clinic. The small autoclaves produced for the doctor’s surgery offer a choice of temperatures, pressures and sterilizing times.
      The highest temperature that can be reached by boiling water at sea level in an open vessel is 100 degree C. With increased pressure, the water can be raised to much higher temperatures before it boils, e.g. at a pressure of 0.35 kg per cm2 (5 psi) the temperature reaches 105.5 degree C: at 0.7 kg per cm2 (10 psi). 115 degree C; and at 1.05 kg per cm(15 psi) the temperature will reach 121 degree C, etc.
      In a sterilizer chamber (autoclave) which has been well exhausted of air the steam entering promptly fills the free spaces surrounding the load. As steam contacts the cool outer layers of the fabrics a film of steam condenses, leaving a minute quantity of moisture in the fibers of the fabrics. Air contained in the fabric interstices, being heavier than steam, is displaced by gravity in a downward direction, and the latent heat given off during the process of condensation is absorbed by that layer of the fabrics (Fig. 1.15).
      The next film of steam immediately fills the space created when the first film condensed into water, and it does not condense on the outer layer of the fabrics but penetrates into the second layer, condenses and heats it. This process continues until the whole load is heated through and no further condensation occurs, the temperature within the pack remaining at that of the surrounding steam.
•     ‘Quick’cycle would heat the water to 134 degree C (273 degree F)  for 3.5 min under a pressure of 30 lb/in2.
•     Slower cycle, more suitable for plastics, would heat the water to 121 degree C under a pressure of 15 lb/in2 15 minutes.
•     In practice, instruments are placed in the trays or in packs, the autoclave turned on, and left for the desired time.
•     At the end of the cycle, the instruments are ready for use.
•     The main disadvantage of the smaller autoclave is that instrument packs cannot be sterilized as there is not a vacuum cycle to extract air and dry the packs. However, most materials including rubber, plastics and metal can be readily sterilized, the only exception being sealed containers.
Any questions be sent to drmmkapur@gmail.com
All older posts are stored in archives for access and review.
Visitors that follow may post contributions to the site.
To create consumer/provider engagement visit www.surgseminar.blogspot.com

Thursday, January 24, 2013

INFECTION CONTROL 9


Sterilization by Hot-air Ovens

These are thermostatically controlled ovens, with an electric heating element, similar to a domestic electric oven.

•     Instruments to be sterilized are heated to 160 degree  C  (320  degree F) for 1 hour

•     Sterilization is achieved, but it is not suitable for rubber or plastic instruments

•     In hospital has been used for sterilizing powders and petroleum products and sharp delicate instruments.

      The efficiency of dry heat sterilization depends on the initial moisture of the microbial cells, but all microorganisms are killed at 160°C for a hold time of not less than 2 hours.
            The main advantages of dry heat sterilization are its ability to treat solids, nonaqueous liquids, grease/ointments and to process closed (airtight) containers. Lack of corrosion is impor­tant in the sterilization of nonstainless metals and surgical instruments with fine cutting edges

Any questions be sent to drmmkapur@gmail.com
all older posts are stored in archives for access and review.
Visitors that follow may post contributions to the site.
To create consumer/provider engagement visit www.surgseminar.blogspot.com  

Thursday, January 17, 2013

INFECTION CONTROL 8


Disinfecting Solution (Table 1.2)
• Alcohol (ethyle + isopropyle) 70 percent was the solution most widely used
• Recently of 0.5 percent chlorhexidine is widely used for emergency disinfection of surgical instruments requiring only 2 minutes immersion.
• Where instruments are left for longer periods or stored continuously, the addition of one tablet of sodium nitrite 1 g will prevent rusting. As the tablet dissolves over several days, another is added.
• The aldehydes (formaldehyde + glutaraldehyde) are powerful disinfectants and sterilizers. A solution containing 2 percent glutaraldehyde will disinfect instruments if they are soaked for 10 minutes, and sterilize if left soaking for 10 hours. The disadvantages are that the solution needs to be fresh, and it can cause staining if left on the skin.

Boiling


This is still the most widely used method of disinfecting instruments in the World;
• It is simple, quick and reasonably effective
• Will not destroy certain bacterial spores (tetanus, gas-gangrene) and certain viruses
• Normally, instruments are cleaned, and then boiled for 5 minutes (100 degree C or 212 degree F)
• A boiling water ‘sterilizer’ is badly named, because at a height of 3000 meters water boils at 90 degree C and is thus much less effective

• This method is obviously not suitable for dressings or drapes.
Any questions be sent to drmmkapur@gmail.com
All olderposts are stored in archives for access and review.
Visitors that follow may post contributions to the site.
To create cosumer/provider engagement visit www.surgseminar.blogspot.com

Monday, January 14, 2013

INFECTION CONTROL 7


Procedures in the Case of Accidental Injury

Should the operator or assistant be accidentally pricked, e.g. needle-stick injury, the site of entry should be immediately encouraged to bleed, should be thoroughly washed with warm, soapy water, and a sterile dressing applied. An entry should be made in the Accident or Infection Book, with the date, circumstances, names of those present and the time and name of the patient, nature of accident, and final outcome on follow up entered later on. All this information will be of great help in case of outbreak of infection in the hospital and preventing future outbreaks.

Sterilizing and Disinfecting Instruments

Sterilization is the destruction of all living organisms.

     An item may only be sterile or nonsterile.

     It cannot be nearly sterile.

     Disinfection, on the other hand is the reduction of a popula­tion of pathogenic microorganisms without achieving sterility.

     In these cases not all bacterial spores are destroyed.

      Antiseptics are used in the skin to prevent infection. They are milder than disinfectants, e.g. iodine, hydrogen peroxide and chlorpexadine.

      There are four methods of sterilizing or disinfecting instru­ments in general practice:

1.   Antiseptic solutions.

2.   Boiling.

3.   Hot air ovens.
4.   Autoclave.

Any questions be sent to drmmkapur@gmail.com
All older posts are stored in archives for access and review.
Visitors that follow may post contributions to the site.
To create consumer/ provider engagement visit www.surgseminar.blogspot.com
www.drmmkapur.blogspot.com  

Friday, January 4, 2013

INFECTION CONTROL 6


Cleaning the Theater
Clean it thoroughly after each day’s list, and completely every week.
Decontamination of Furniture and Fixed Equipment

•     The room itself and its furniture and fixed equipment can be cleaned and disinfected
•     All equipment and furniture used during a surgical procedure are thoroughly cleaned
•     Floors should be cleaned using a wet-vacuum system. This can be a centralized built in system or a portable wet-vacuum. If neither is available, the following procedure may be used:

      a.   Two buckets are filled with disinfectant/detergent.
      b.   Mop heads must be sterilized or a disposable mop head (used once only) used in the operating room suite.
      c.   Solutions and mop heads are changed for each suite and the buckets cleaned before new solution is mixed.
•     The pads of the operating table are removed to expose the undersurface of the table. All surfaces of the table and pads are cleaned with particular attention to hinges, pivotal points, and castors

•     Doors and walls are spot cleaned with disinfectant.

End of Day Cleanup
•     Surgical lights and slide tracks
•     All ceiling-mounted equipment
•     All furniture including castors or wheels
•     All shelves, counters, work tables and autoclave cabinet tops
•     All floor surfaces in the department the surfaces are corbo-lised
•     Scrub sinks
•     Soap dispensers.

Weekly Cleanup
•     Ventilation and air conditioning/heating duct grills must be vacuumed to prevent the release of bacteria-laden dust into the surgical environment.
•     Utility rooms, including those used to store house keeping supplies, sewer hoppers, and linens, must be cleaned.
•     OT Fumigation is utilized after occurrence of infection.

Cleaning Instruments
Use an old scrub brush. Open hinged instruments fully, scrub them, and take special care to clean their jaws and serrations

Any questions be sent to drmmkapur@gmail.com
All older posts are stored in archives for access and review.
Visitors that follow may post contributions to the site.
To create consumer/provider engagement visit www.surgseminar.blogspot.com
www.drmmkapur.blogspot.com  


Thursday, December 27, 2012

INFECTION CONTROL 5


The Operation Site
Shaving
The operation area should be clean before the operation, and you have to check this in the ward before sending the patient to the OT (Figs 1.12A to E).
•     Shave the area on the morning of the operation, or as part of operation.
Preparation
Prepare the skin as soon as the patient is anesthetized.
•     Start with a soap solution, and follow this with spirit
•     If there is a low sensitivity to iodine in the community, use alcoholic iodine
•     Take a sterile swab on a holder start in the middle of the operation site, and work outwards
•     Discard both swab and holder, and repeat the process with a second swab (some surgeons use a third)
•     The last is spirit which will evaporate to leave the skin dry
•     Be sure to prepare a wide enough area of skin
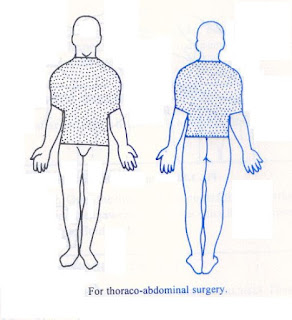
•     In an abdominal operation this should extend from the patient’s nipple line to below his groin.
Draping
The skin has been prepared
•     Place the first towel across the lower part of the operation site
•     Place another towel at right angle on the nearer edge of the operation site 
•     Apply a towel clip at the point of crossing of the two towels
•     Place another towel at the far edge of the operation site
•     The final towel goes across the top end of the site. All the corners should have towel clips to prevent them from slipping, they can go through the skin if the operation is under GA
•     In an abdominal operation an abdominal sheet covers the abdomen on top of the towels. This sheet has an opening in its middle to provide access to the operation site [double toweling]
•           If any area close to the operation site becomes contaminated at any time during the operation, place another sterile towel over the contaminated site.

Any questions be sent to drmmkapur@gmail.com
All older posts are stored i archives for access and review.
Visitors that follow may post contributions to the site.
To create consumer/provider engagement visit www.surgseminar.blogspot.com
www.drmmkapur.blogspot.com  

Thursday, December 20, 2012

INFECTION CONTROL 4


GOWNING

Hold the gown away from your body, high so as that it does not touch the floor.

•     Allow it to open up and put your arms into the arm holes while keeping your arms extended. The inside of the gown is facing you

•     Then flex your elbows and abduct your arms (Fig.)

•     Wait for the nurse to help you. She will hold the inner sides of the gown at each shoulder and pull them over your shoulders (Fig.) and will tie the tapes of the gown at the back .

GLOVING

Dust your hands with powder and rub them together to spread it.

•     Be careful to touch only the inner surface of the gloves.

•     Grasp the inner aspect of the turned down cuff of a glove, and pull it on to your opposite hand (Fig)

•     Leave its cuff for the moment

•     Put the fingers of your already gloved hand under the inverted cuff of the other glove, and pull it on to your bare hand (Figs 1.10 to 1.11A and B)

•     It is a good routine to wash your gloved hands in sterile water to remove the powder.

EYE PROTECTION

Masks and protective eyewear or face shields should be worn during procedures that are likely to generate droplets of blood or other body fluids, to prevent exposure of mucous membranes of the mouth, nose and eyes.

      They are lightweight, adjustable and do not obstruct vision. An educational programe is necessary to introduce surgeons to these new barriers.
Any questions be sent to drmmkapur@gmail.com
All older posts are stored in archives for access and review.
Visitors that follow may post contributions to the site.
To create consuer/provider egagement visit www.surgseminar.blogspot.com